There’s something about a Ralph Lauren Christmas that makes me want to curl up on the sofa and stay awhile. I love the red, green, gold and blue, the classic plaid, the gold accents and all that greenery. It feels warm, nostalgic and welcoming—and I’ve definitely considered doing my own version, with a little of my own flair.
I wouldn’t want my home to ooze Ralph Lauren, but a few touches? Absolutely. Swap out some pillow covers, add a plaid throw, bring out the gold candlesticks and a couple of nutcrackers, and suddenly I can see it coming together. The Christmas decorations I’ve had since childhood would probably fit right in, too. Not perfectly, but pretty close—and I like having those memories mixed in.
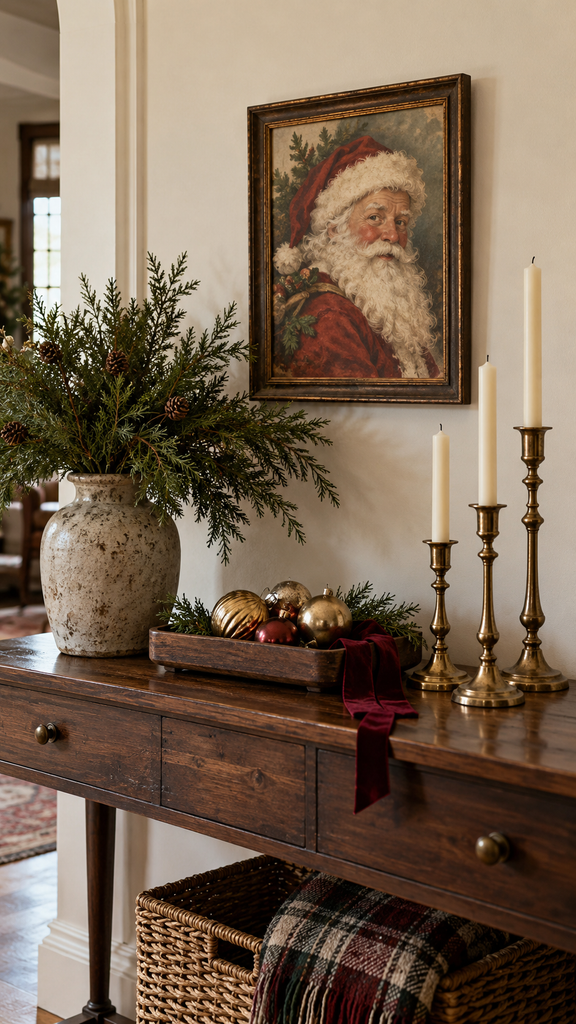
Last year, I also purchased a vintage-style Santa print for just $12 and put it in a basic frame. I love that something so inexpensive can work with just about any Christmas decorating style. Whether I lean into plaid and gold or keep things soft and neutral, he’ll have a spot somewhere in my home.
I’m also happy to get a little crafty if it saves money. Last year, I made several gold bells for my mantel and a few other spots around the house using toilet paper rolls cut to size, gold paint, Rub ’n Buff and a hot glue gun. Simple supplies, and the finished bells were surprisingly convincing. The ladies at my Christmas brunch were impressed… at least that’s what they told me!
That’s how I’d approach a Ralph Lauren Christmas look on a budget: keep the decorations I love, repeat a few colours and textures, and fill in the gaps with affordable finds or an easy DIY. A little plaid here, some greenery there, and warm gold accents to pull it together. I think it’s a look you can make your own without spending a fortune or turning Christmas decorating into a major project.
If you enjoy mixing affordable finds with pieces you already love, I share more ideas for decorating your home on a budget without making it look cheap.
1. What Makes the Ralph Lauren Christmas Look Work?
To me, the appeal is the mix of traditional colours, classic plaid, greenery and decorations that feel collected over time. And that last part is something I can absolutely relate to.
I have plenty of red, gold and silver ornaments sitting in my basement, ready for another Christmas. There are green ones, too—although they’re more chartreuse, from when my house leaned heavily into brown and chartreuse. Maybe that combination will come back. Who knows? I’ll be ready! I might leave the red and green packed away this year, but the gold and silver have worked with my Christmas decorating for as long as I can remember.
Some are the very same ornaments I remember placing on our real tree when I was about 10. I can still recall the smell of the pine. How awesome is that? More than 40 years of Christmas celebrations, decorating and packing everything away, and I still have most of them. I’ve broken a couple along the way, but considering how many times those ornaments have been handled, I think their survival is quite the feat.
Those are the pieces that make my heart warm. Memories are such a special part of Christmas, and I want room for them in whatever decorating style I choose.
To bring in that Ralph Lauren-inspired feeling, I’d build around those familiar pieces with a few connecting details:
- Choose colours from your existing ornaments. Red, green, navy and gold are classic choices, but you don’t need every colour. I’d happily keep my silver ornaments in the mix.
- Add a little plaid. Use a throw, pillow cover or ribbon that picks up one or two of your chosen colours.
- Layer greenery and texture. Evergreen branches alongside velvet ribbon, soft knits or wood give the display warmth and depth.
- Finish with warm lighting. Tree lights, lamps and candlelight help those familiar decorations shine.
Before buying anything, unpack your favourites and see what works together. You may only need ribbon, a couple of pillow covers or some extra greenery to connect the pieces you already love.
2. Bring in Tartan With Throws and Pillow Covers
I do love tartan. It makes me think of Christmas in England or Scotland—cozy rooms, old buildings and traditions carried through generations. I’m drawn to its Scottish history and the connection many tartans have to clans and families. That appreciation for history goes beyond fabric, too. When I visited France and Italy, I was fascinated by the architecture: the stonework, textures, details and how these buildings were constructed. Seeing structures that have stood for centuries—and, in some cases, thousands of years—with my own eyes was mind-blowing. Maybe that’s part of what draws me to the Ralph Lauren look: those traditional patterns, layered textures and pieces that feel like they have a story.
Start With One Plaid You Love
Look for a tartan that includes colours you already have in your decorations. A red, green and gold plaid could connect traditional ornaments, while a deep navy-and-green combination would give a quieter effect. A plaid with cream or beige in the background can also sit beautifully alongside neutral furniture.
You don’t need to repeat the exact pattern everywhere. I’d start with one throw or a pair of pillow covers, then use solid colours to give the pattern some breathing room.
Keep Some of Your Everyday Pillows
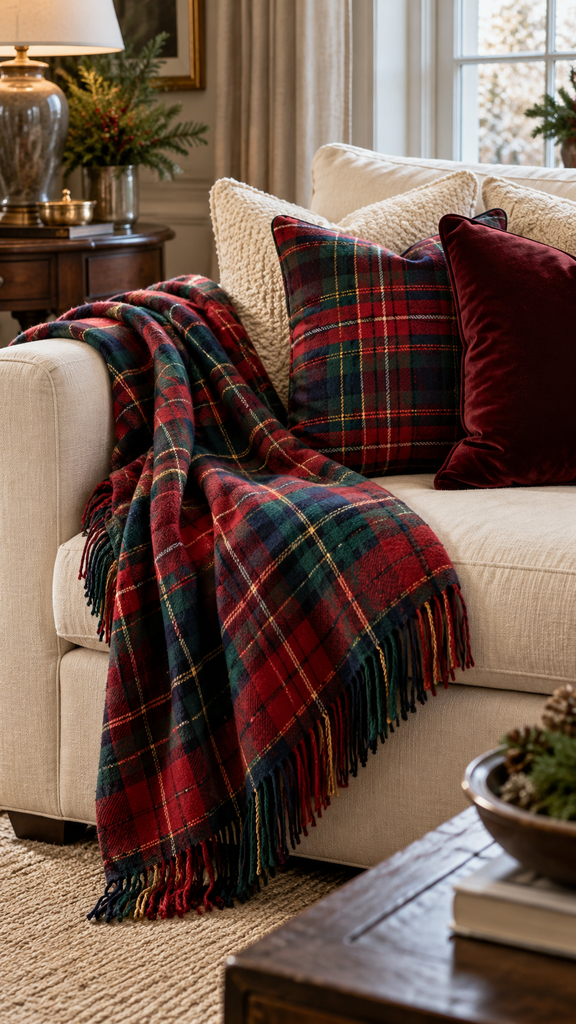
There’s no need to clear the sofa and start again. Keep your cream, beige or other neutral pillows, then add a tartan cover and perhaps a solid velvet cover in a colour pulled from the plaid.
An easy combination to try: your existing neutral pillows + one tartan pillow + one solid velvet pillow. If you already have a plaid throw, you might only need the solid cover.
Reusing your pillow inserts also means less to buy and less to store. Just check the measurements before ordering—many listings are for covers only.
Choose a Throw You’ll Enjoy Using
A wool tartan throw can be a lovely purchase if you’ll use it every winter, but it isn’t essential to the look. Chenille and other soft woven options can bring in the same pattern at a price that suits your budget.
I’d check the fabric, care instructions and dimensions before buying. A throw should be comfortable enough to curl up under, not just look pretty draped over the chair.
Start with one useful piece you love. You can always add more once you see how it works with the decorations you already own.
Check out my Amazon storefront for affordable essentials and find everything from throws and pillows to lighting and more!
Disclosure: As an Amazon Associate, I earn from qualifying purchases at no extra cost to you.
3. Bring Your Christmas Colours Together With Candles, Ribbon and Greenery
Once you’ve chosen your colours, repeat them in a few places to help everything feel connected. Candles, brass candlesticks, velvet ribbon and evergreen boughs are the pieces I’d reach for. They work with so many Christmas decorating styles, which makes them useful long after you’ve moved on from one particular look.
Layer Candles and Brass Candlesticks
I love brass candlesticks in varying heights, grouped on a dining table, mantel or console. Add candles in cream, burgundy, deep green or navy to pick up colours from your plaid and ornaments.
Scented or unscented candles both have their place. A favourite Christmas scent can add to the atmosphere, while unscented candles are a good choice for the dining table. Flameless candles are handy where you want that glow close to ribbon or greenery.
Repeat Velvet Ribbon Around Your Home
Velvet ribbon is an easy way to carry a colour from one space to another. Tie it into bows on the mantel, tuck lengths throughout the tree, or let the tails cascade down a staircase garland. A generous bow can also finish an evergreen arrangement in a planter beside the front door.
You don’t have to use it everywhere. Choose a few spots where that repeated colour will bring your decorations together. I know I’ll use ribbon and brass candlesticks year after year, so I’m happy to buy pieces I love and bring them out again.
Make Evergreen Boughs Go Further
Evergreen boughs on the mantel, woven with fairy lights and favourite Christmas decorations, are a must in my home. I also like using greenery in smaller, sometimes unexpected places:
- In the kitchen: Attach a small bundle to a wooden cutting board used for display, finished with ribbon.
- On a mirror: Gather several pieces into a swag and secure it to the frame with a bow.
- In the powder room: Arrange a few branches in a rustic vase on the counter.
- At the front door: Fill a planter with boughs, then add lights and ribbon.
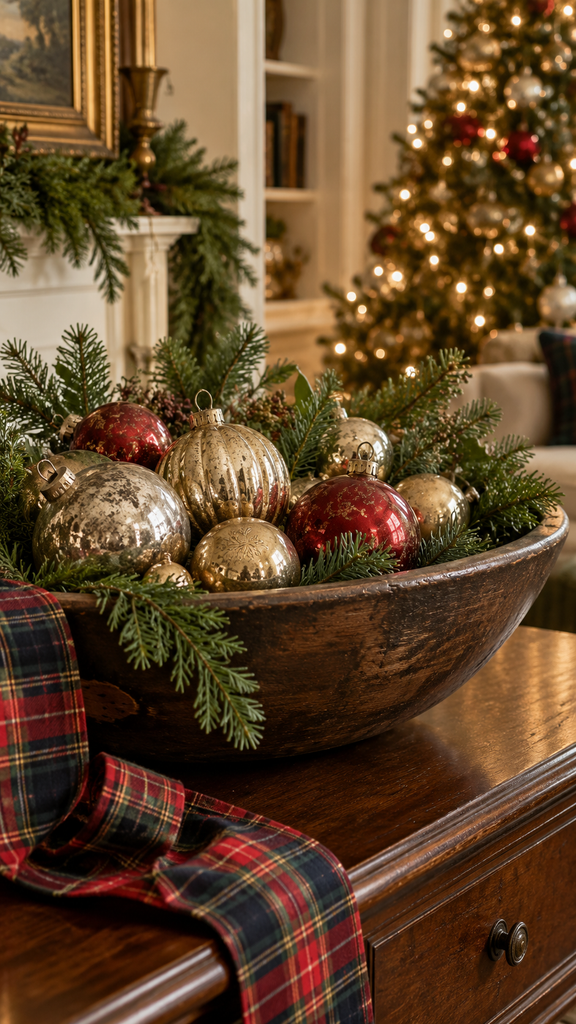
- In a wooden bowl: Nestle a few evergreen sprigs in the bottom, then place loose ornaments on top. I especially love this combination—the warmth of the wood, fresh greenery and familiar ornaments make a simple, beautiful display for a coffee table or dining table.
If you have suitable trees or shrubs in your own yard, you may already have what you need. A few careful snips can provide enough greenery for several little arrangements. With fresh greenery, expect to replace pieces as they dry, particularly indoors, and keep it away from heat and open flames.
My Almost-Free Cedar Christmas Trees
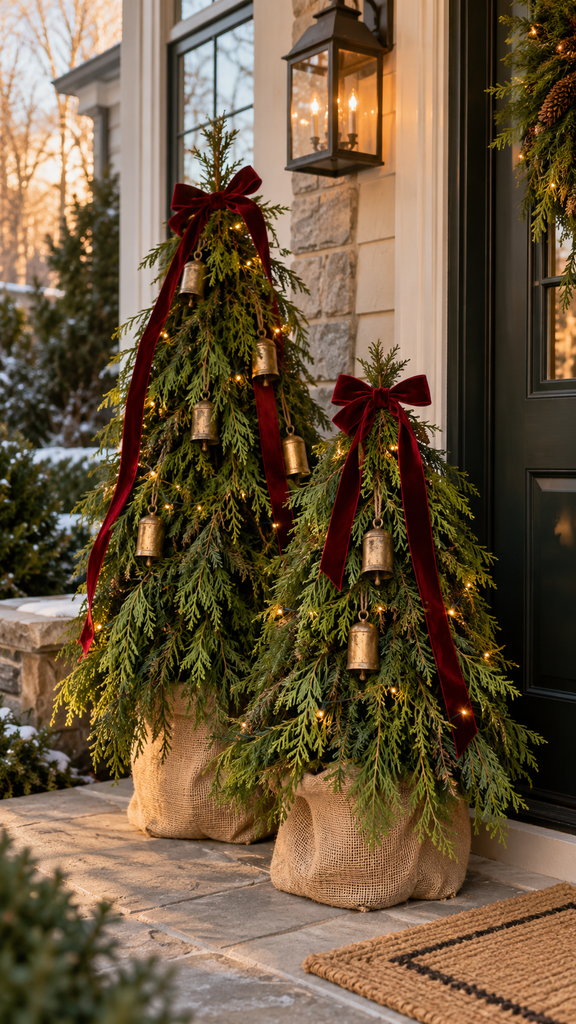
Last year, during my DIY craze, I made two cedar trees for outside our front door—one about four feet tall and the other about three. I placed the shorter tree slightly in front of the taller one, which gave the display a lovely layered look.
I used cedar boughs that had been cut or had fallen, securing them around a branch with fishing line to build each tree’s shape. Then I anchored each branch in quick-setting cement inside a black planter.
I discovered the hard way that the base needs to be heavy and stable enough for its location. The wind at my front door had opinions about my decorating!
The container itself didn’t need to be beautiful because I wrapped it in burlap. I finished each tree with fairy lights, a bow and my DIY toilet-paper-roll bells. They cost next to nothing using supplies I already had, and they brought together so many of the details I love: greenery, warm light, gold accents and something handmade.
Before buying more decorations, try combining what you have in one spot. A few evergreen branches, candlesticks and a ribbon that picks up a colour from your tree might be all it takes.
4. Give Your Christmas Tree a Classic, Collected Look
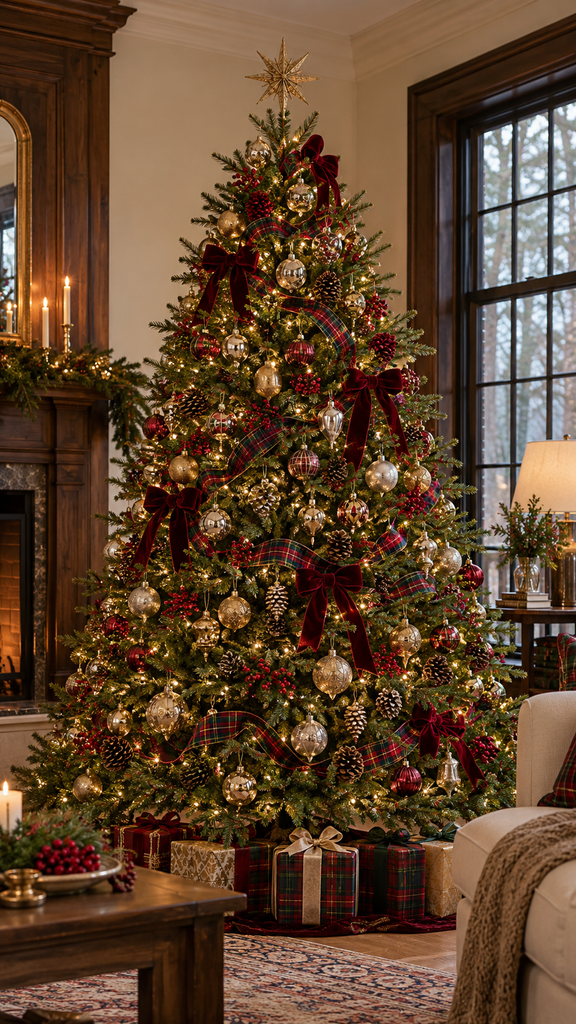
If I decided to give my tree a Ralph Lauren-inspired look, I’d start with the ornaments I already own. Those gold and silver decorations hold too many memories to stay packed away just because I’m trying something different. I’d use ribbon, a few tartan details and some extra greenery to bring the look together.
Let Your Favourite Ornaments Lead
Before buying anything, lay out the ornaments you want to use and look at their colours, sizes and finishes. That gives you a starting point for choosing ribbon and any additions.
For a traditional look, I could bring out my red ornaments alongside the gold and silver, then add a plaid ribbon that connects those colours. For something quieter, I could keep the metallics and choose deep green or navy velvet ribbon.
Your sentimental ornaments deserve a place, even if they don’t fit the colour scheme perfectly. I’d rather have a tree full of memories than one that feels like it belongs in someone else’s home.
Add Ribbon Before the Ornaments
Once the lights are on, add your ribbon so you can position it without working around delicate decorations.
For a soft, flowing effect, cut ribbon into manageable lengths and tuck the ends into the branches, letting each section curve naturally. You can also tie individual bows and spread them around the tree. Wired ribbon helps hold loops and shapes; soft velvet works beautifully for bows with loose tails.
Step back occasionally to check the balance. Repeat the ribbon around the tree, leaving room for the ornaments to stand out.
Fill Gaps With Greenery and Berry Picks
One useful idea is to tuck evergreen, pine-cone or berry picks into sparse areas. You don’t need to fill every opening—just add enough to give those spots a little more fullness and texture.
Choose foliage that looks natural beside your tree. Some faux greenery is quite blue or yellow, so compare the colours before buying several packs. Red or burgundy berries can also repeat a colour used in your ribbon, pillows or mantel decorations.
Mix Familiar Decorations With a Few Tartan Touches
If you want more plaid, add a handful of fabric-covered ornaments among your existing ones. This could also be a lovely DIY using spare fabric and baubles you no longer enjoy.
Place larger ornaments first, including a few farther inside the branches to give the tree depth. Then add smaller pieces and your favourites where you’ll see and enjoy them. Spread the colours around, but don’t worry about making everything perfectly even.
That would be my approach: familiar ornaments, warm lights and a few thoughtful additions. Enough to bring in that classic Christmas feeling while keeping the tree unmistakably ours.
5. Start With What You Already Own
Before I buy anything, I need to head downstairs and see what’s actually in those Christmas bins. There’s a good chance I already own something that will work—or something I forgot I had. Please tell me I’m not the only one who does that!
I’d also look around the house. A wooden bowl, a favourite tray, framed artwork or brass candlesticks can become part of a Christmas display with a little greenery and ribbon. Those everyday pieces give you somewhere to start without adding another box of decorations to store.
Give Familiar Pieces a Different Job
My $12 vintage-style Santa print is a good example. Last year, I put it in a basic frame in the powder room, but it could just as easily sit on a shelf or console beside a small vase of evergreen branches. I love a purchase that can move around the house and work with whatever Christmas mood I’m in.
The same goes for loose ornaments. A few in a wooden bowl with greenery underneath can look beautiful. Tuck smaller ones into a garland, or gather them on a tray with flameless candles. Sometimes changing where you use something is enough to make it feel new again.
Try One Small Display First
If I were testing this look, I’d start with a console or mantel rather than commit the whole house. I’d gather:
- A piece I already love, such as my Santa print.
- Greenery for fullness and texture.
- Brass candlesticks or another gold accent.
- A little plaid or velvet ribbon to connect the colours.
Then I’d live with it for a few days. Does it feel like me? Does it work with the rest of the room? Would one small addition help?
That’s when I’d make a shopping list. It’s much easier to choose the right ribbon or pillow cover when I know what I’m trying to bring together. And if the display already makes me happy, well, that’s money I don’t need to spend.
6. Mix Old Favourites With Thoughtful New Finds
Brass bells, vintage-style Santas, ornaments, greenery, throws and pillow covers—these are so much fun to shop for at the beginning of the season. I love heading to HomeSense to see what’s new and what unexpected treasure I might come across.
If something really speaks to me, I usually feel compelled to bring out the credit card. Especially if it’s unique. I’m still thinking about a giant cork sculpture I left behind this spring—and the champagne-cork version I spotted later. Not exactly a Ralph Lauren Christmas decoration, but apparently I can hold a grudge against my own shopping decisions!
Shop for What Will Bring Your Pieces Together
For this Christmas look, I’d focus on additions that work with my older decorations: a tartan throw, velvet pillow covers, aged brass bells or a beautiful garland. Those pieces can connect what I already own without making everything look like it came from the same shelf.
Try pairing:
- Older ornaments with new ribbon that picks up one of their colours.
- A familiar Santa or framed print with greenery and brass candlesticks.
- A new tartan throw with existing neutral pillows, adding a velvet cover if needed.
- A wooden bowl or tray with loose ornaments and a few evergreen sprigs.
Save on Seasonal Details, Choose Lasting Pieces Carefully
Pillow covers, ribbon and individual greenery picks are the smaller purchases I’d consider first. For something more expensive, such as a wool throw or substantial brass candlesticks, I’d want to know I’d enjoy using it for years.
Thrift stores and antique shops are also worth a look for frames, wood pieces and candleholders with a little character. You don’t need genuine antiques everywhere to get that collected feeling.
The goal is to choose something that adds to what you love. A few thoughtful purchases alongside decorations with history can give you that warm, traditional Christmas atmosphere—and still leave room for your own personality.
7. Make Your Greenery Look Fuller and More Natural
Greenery is one of my favourite parts of Christmas decorating, but sometimes a garland needs a little help when it comes out of the box—or the storage bin. Flattened branches and a few bare patches don’t mean it’s time to replace it.
Before buying another one, I’d give the greenery I own some attention.
Fluff First, Then Fill the Gaps
Lay the garland out and gently separate the branches, bending them in different directions rather than leaving everything pressed flat. Follow any shaping instructions, especially around built-in lights.
Put it in position before adding anything else. That way, you can see where it actually needs more fullness. There’s no point decorating the back if it’s sitting against a wall!
Tuck individual evergreen picks into thin areas, following the direction of the surrounding branches. Pine-cone stems add texture, while red or burgundy berries can pick up colours from your ornaments or tartan.
I’d add a little, step back and look again. It’s much easier to see what’s missing from across the room than with your nose in the garland.
Check the Greens Before Mixing Them
This was a useful detail from the video: faux greenery comes in quite different shades. Some pieces lean blue, others yellow, and some are a deep forest green.
Different varieties can look beautiful together, but place them side by side first. If one looks noticeably out of place, try it elsewhere rather than forcing it into the arrangement.
Give It Shape and Room to Drape
On a mantel, let a few branches fall naturally over the edge instead of arranging everything in a perfectly straight line. You could keep the display balanced at both ends or let one side trail farther down.
On a console, leave room for a framed picture or candleholders rather than covering every inch. I want to enjoy the decorations I’ve placed there, too!
Finish with fairy lights and a few bows, keeping battery packs accessible. Use secure supports suited to the surface and the weight of the display, particularly on stairs.
My approach would be to improve one garland before buying three more. A little shaping and a handful of well-placed stems may be enough.
** You might also like my round‑up of Amazon Christmas décor gifts to complete the look.
8. Choose a Few Finishing Touches That Pull It Together
This is where I could easily get carried away. Bells, bows, stockings, nutcrackers—there’s always one more lovely thing to add. But once the greenery and main decorations are in place, I’d pause and see what the room actually needs.
A few repeated details will do more for the look than a collection of unrelated purchases, even if they’re all beautiful.
Let Stockings Repeat Your Colours
If stockings are part of your Christmas decorating, they’re a good place to repeat the tartan or velvet used elsewhere.
Burgundy velvet would look lovely beside traditional greenery and gold accents. Tartan stockings could pick up the colours of a throw or tree ribbon. And if you already own stockings you love, keep them—try adding a coordinating bow to the hanging loop.
Check the size before ordering new ones, especially if you’re mixing styles. Product photos don’t always make those differences obvious.
Give Nutcrackers and Bells Somewhere to Shine
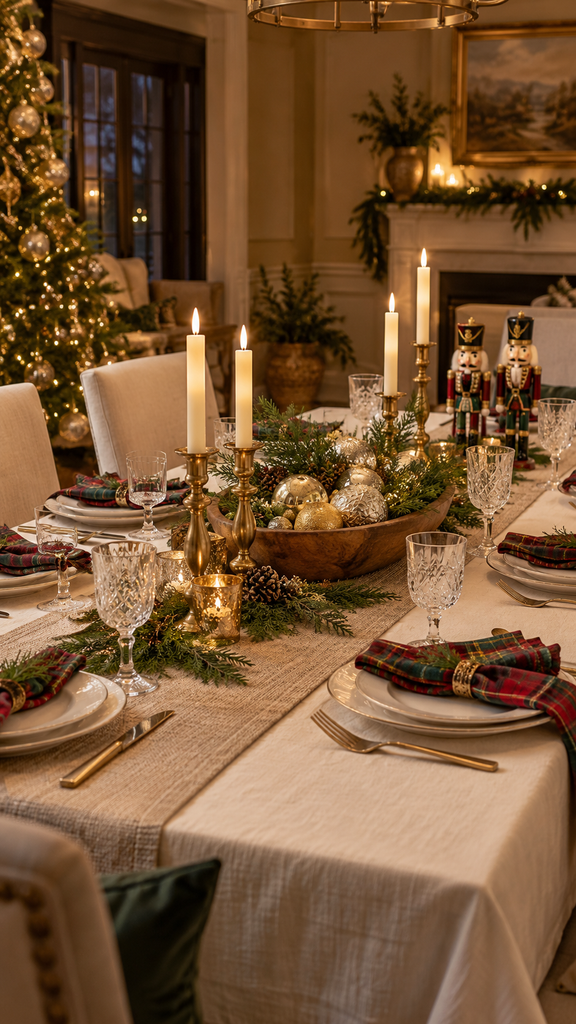
I’d group a couple of nutcrackers on a console or beside a framed print, leaving enough space to appreciate their details. They don’t need to compete with every ornament I own.
The same goes for bells. Tie a small cluster onto a wreath or hang them at one end of a garland. My homemade gold bells would be coming out again for exactly this sort of thing. After all that cutting, painting and hot gluing, they’ve earned another Christmas!
Carry the Look Onto the Table
You can bring the same feeling to a dining table without buying Christmas dishes.
I’d start with everyday plates, add plaid or plain fabric napkins, and use brass candlesticks in varying heights. A little greenery down the centre or a wooden bowl filled with ornaments would connect it to the rest of the room.
Keep arrangements low enough for conversation and leave room for the food. A beautiful table loses some appeal when there’s nowhere to put the potatoes.
Before calling it finished, look around the room. Can you see a colour, pattern or material repeated in a few places? If so, it probably feels connected already. You may not need that last thing in your shopping cart. I know. Disappointing.
For more inspiration, take a look at my Christmas table décor ideas, where I bring together candlelight, family pieces and the occasional unexpected centrepiece.
9. My Simple Plan for Bringing the Look Home
If I chose to do a Ralph Lauren-inspired Christmas, I’d tackle it in this order. Otherwise, I know how easily “a few new touches” could turn into several shopping bags.
1. Unpack Before Shopping
Bring out the decorations you genuinely want to use. Separate anything broken, check the lights and see what’s available before making a list.
2. Choose One Starting Piece
It could be a tartan throw, favourite ornaments or ribbon you already own. Pull two or three colours from that piece to guide the decorating. Gold and silver can still sit alongside them.
3. Finish One Area First
Choose the tree, mantel or console—somewhere you’ll enjoy seeing every day. Try your colours there before carrying them throughout the house.
For a console, I’d start with greenery, my Santa print and brass candlesticks. Then I’d add ribbon in a colour used on the tree. Simple enough to try without committing the whole house.
4. Write Down What’s Actually Missing
Be specific: two pillow covers in the right size, ribbon for the wreath, or a few stems to fill a garland. Measure where needed before shopping.
That gives a HomeSense visit some direction. Whether I stick to the list is another matter, but at least I’ll have one!
5. Add Something Personal
Bring in the decorations with memories attached, a handmade piece or something unexpected that makes you smile. Those are the details I’d want to notice when I sit down in the evening.
6. Stop and Enjoy It
Turn on the lights, sit in your usual spot and look around. Does it feel warm and welcoming? Does it feel like your home?
That would be my measure of success. A little Ralph Lauren inspiration, plenty of familiar Christmas favourites, and enough time left to enjoy it all.
10. Shop the Look
For this article, a small, thoughtful selection plus the storefront would be more helpful than either a long shopping list or the storefront alone.
- Tartan pillow covers
- Faux cedar garland
- Velvet ribbon
- Brass candlestick dupes
- LED taper candles
- Affordable framed art
I have collected a few of my favourite selections if you would like to browse more classic Christmas décor in my Amazon storefront.

Final Thoughts
A Little Ralph Lauren Inspiration, A Lot of Your Own Christmas
The more I think about this look, the more I realize how much of it I already have tucked away. The gold and silver ornaments, candlesticks, Santa print and homemade bells could all have a place. Add some tartan, velvet ribbon and plenty of greenery, and I can picture it coming together.
I’d still want my home to feel like me. Some decorations would coordinate beautifully; others would be there because I remember hanging them on a tree when I was 10. Those have earned their spot.
If you love this style, open your Christmas bins before opening your wallet. Try a few pieces together, add what’s missing and see where it takes you. You might be closer to the look than you think.
And if you spot something wonderful at HomeSense, give it a little thought. Apparently, I’m still thinking about that champagne cork.
What would you bring out first—a favourite plaid, a treasured ornament or something you’ve made yourself?
You Might Also Like to Read
- 4 Easy DIY Christmas Ornaments That Can Look Expensive — Affordable, handmade touches to make your tree feel personal.
- Cozy Christmas Morning Ideas — Simple ways to enjoy a slower, more relaxed start to Christmas Day.
- Holiday Outfit Inspiration — Because once the house is decorated, there’s still the question of what to wear!
Leave a Reply