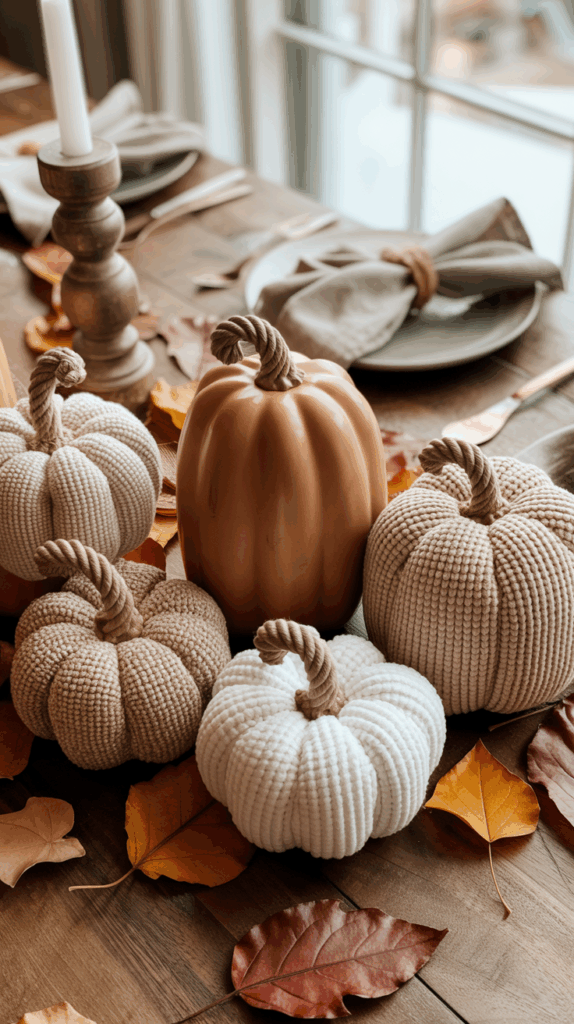
Fall is officially here, and I’ve got the coziest DIY project to bring neutral, textured vibes into your home: handmade fabric pumpkins! Whether you’re working with soft bouclé fabric or giving an old thrifted sweater a second life, these pumpkins are easy to make, plush, and perfectly Instagram-worthy.
I love how versatile they are—scatter them on a table centerpiece, line your entryway, or style them on a shelf with autumn décor. The best part? You can customize them with rope stems for that modern rustic touch that fits any neutral, cozy space. Trust me, these pumpkins aren’t just cute—they’re a fun, simple fall craft anyone can tackle, even if you’ve never sewn a thing before!

Materials You’ll Need
| Material | Suggested Affiliate Link | Notes |
|---|---|---|
| Bouclé fabric or old/thrifted sweater | Amazon boucle fabric | Soft, textured fabrics work best; sweaters add extra coziness |
| Pillow stuffing | Polyfill stuffing | You can also repurpose old pillows |
| Needle & thread | Hand-sewing kit | Matching or neutral color thread works best |
| Scissors | Fabric scissors | Sharp fabric scissors make cutting easier |
| Rope | Craft rope | Fold in half to create a stem |
| Twine | Natural twine | To wrap the rope stem |
| Hot glue gun & glue sticks | Mini hot glue gun | For attaching the stem securely |
1. Cut the Fabric
- Start by cutting a circle from your boucle fabric or thrifted sweater. The size of the circle will determine the size of your pumpkin: for a medium pumpkin, a 12-inch diameter works well, but you can go larger or smaller depending on your space.
- Pro tip: Use a fabric marker or chalk to trace your circle first—it makes cutting cleaner and more precise, especially with slippery or textured fabrics like boucle.
- If you’re using a thrifted sweater, consider cutting around seams or cuffs for extra texture or a slightly different shape—it adds character to your pumpkin.
- Bonus idea: Mix fabrics! You can use boucle for the front and sweater for the back, or even layer pieces to create subtle texture contrasts.
2. Sew the Base
- Using a running stitch, sew around the edge of your circle. Don’t tie off yet—you’ll need that thread tail to gather the fabric later.
- Pro tip: Keep your stitches evenly spaced (about ¼ inch apart) for a smoother, more professional-looking pumpkin. Even spacing makes shaping the grooves later much easier.
- If your fabric is thick or textured, like boucle or a sweater, use a sharp needle and strong thread so you don’t get snags or breakage.
- Bonus idea: Before sewing, fold the edge of your fabric slightly inward (about ¼ inch) to create a clean hem and prevent fraying—especially helpful if you’re using thrifted sweaters that might unravel.
- Remember, this stitch is just the “foundation” for your pumpkin—it doesn’t need to be perfect, but neat stitches make the final shape more polished and easier to manipulate.
3. Stuff the Pumpkin
- Gently pull the thread slightly to form a small pouch from your sewn circle. This will be the base of your pumpkin.
- Fill the pumpkin with pillow stuffing (or repurposed old pillow filling) until it’s plush but still squeezable—overstuffing can make it difficult to shape later.
- Pro tip: Add stuffing in small handfuls and press down gently as you go. This helps avoid lumps and gives you more control over the final shape.
- If you want a slightly flatter pumpkin bottom so it sits nicely on a table or shelf, press some stuffing toward the bottom as you fill.
- Bonus idea: Mix different types of stuffing for extra texture and volume—soft polyfill for squishiness, and a small bit of fabric scraps for a little extra heft.
- Take a moment to mold it with your hands as you stuff; shaping as you go now makes it easier when you move on to the grooves in the next step.
4. Close the Top
- Once your pumpkin is nicely stuffed, gently pull the thread to close the opening at the top. Make sure all the stuffing stays inside and forms a smooth dome.
- Knot the thread securely to prevent it from loosening later. You can even wrap the thread around a couple of times before tying the final knot for extra security.
- Pro tip: Don’t pull too tightly at first—tighten gradually so you can adjust the stuffing and shape as needed. A too-tight pull can create wrinkles or distort the pumpkin’s shape.
- Bonus idea: Before fully securing the knot, lightly pinch the top to create a small “dimple” where your rope stem will go. This helps the stem sit more naturally and look proportional.
- Take a moment to gently shape the pumpkin with your hands—smooth out any lumps or uneven areas before moving to the groove step.
5. Shape the Pumpkin
- To create those classic pumpkin grooves, thread a long piece of strong thread or embroidery floss onto a needle. You’ll be “lashing” the pumpkin from top to bottom to form the natural indentations.
- Insert the needle through the center top, pull it down to the bottom, and loop it back up toward the top. Repeat this 4–6 times around the pumpkin, evenly spacing each groove.
- Pro tip: Don’t pull the thread too tightly at first—adjust tension gradually. You want visible grooves, but the pumpkin should remain plush and soft.
- If you’re using a mix of fabrics, gently shape each section with your hands as you tighten the threads—this helps emphasize the grooves and gives a more polished, realistic look.
- Bonus idea: For extra depth, twist or slightly bunch the fabric where the thread passes. This adds natural texture and a more designer-like finish without extra effort.
- Take your time—this step is what really gives your pumpkin its character, so patience pays off.
6. Add a Rope Stem
- Take a piece of craft rope and fold it in half to create the basic shape of your pumpkin stem.
- Wrap natural twine around the top portion of the rope to create a finished, rustic look. This also helps secure the rope so it stays in place.
- Attach the stem to the top of your pumpkin using hot glue. Hold it in place for a few seconds to ensure it’s fully secured.
- Pro tip: Before gluing, gently pinch the top of the pumpkin to form a small “dimple” where the stem will sit—this makes the stem look more natural and proportional.
- Bonus idea: Trim or twist the rope ends to customize the height and shape of your stem. You can also add a tiny leaf or fabric accent for extra detail and charm.
- Step back and admire! This finishing touch completes the cozy, handmade look that makes these pumpkins perfect for fall décor, gifting, or even a small seasonal side project.
Wrap-Up: Cozy DIY Pumpkins for Fall
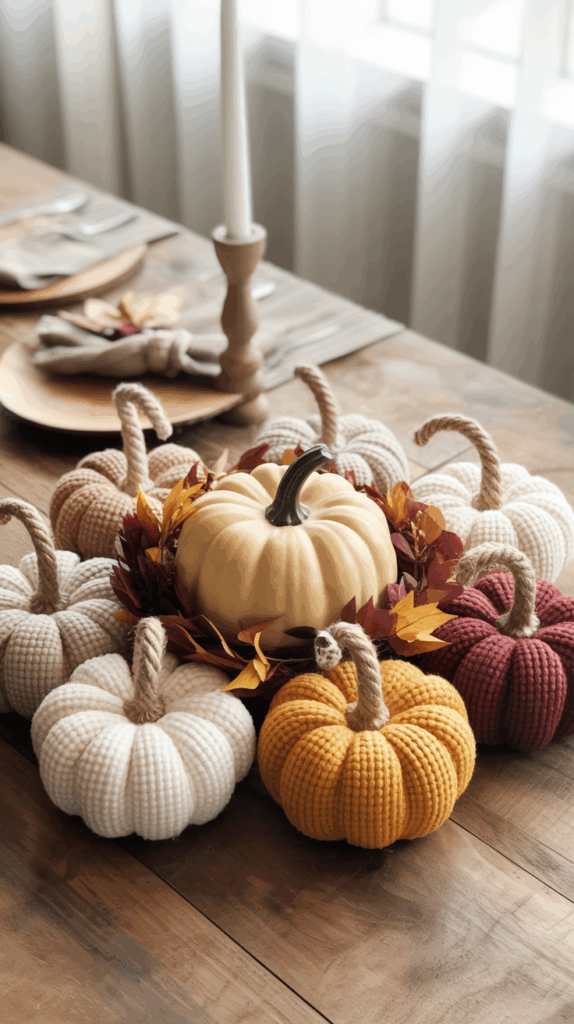
And just like that, you’ve created your very own handmade fabric pumpkins! Whether you chose soft bouclé fabric or gave a second life to thrifted sweaters, these pumpkins are cozy, stylish, and completely customizable. The rope stem adds a rustic, designer-like touch that makes each pumpkin feel unique.
I love how versatile these pumpkins are—use them to style your table centerpiece, spruce up your entryway, or mix with other autumn décor for a neutral, cozy fall vibe. Plus, they make thoughtful handmade gifts or even a fun little seasonal DIY side project.
The best part? This project is simple, satisfying, and incredibly rewarding—you get beautiful, Instagram-worthy fall décor while crafting something truly yours. So gather your fabrics, thread, and rope, and let your creativity shine this season! 🍂
As an Amazon Affiliate, I earn from qualifying purchases at no extra cost to you. This article was created with the help of AI.

Leave a Reply