There are projects you plan… and then there are the ones that somehow come together despite everything working against you.
This past weekend at the ranch was exactly that.
I was sick — like really sick — and very close to staying home. But we decided to go anyway, and somehow, in between coughing fits and couch breaks, we managed to make major progress on one of the biggest upgrades to our tiny retreat so far: the fence.
And when I say “we”… I mostly mean Jason.
Because what he pulled off this weekend honestly still surprises me.
If you’re planning something similar, I shared more of our layout and ideas in this post:
👉 Tiny Retreat Fence Plans & Landscaping Ideas
THE REALITY OF THE WEEKEND
We arrived around 10am after what could have been a much longer border wait (thank you, duty free shortcut 🙌). All I wanted at that point was to curl up and be put out of my misery.
Jason, on the other hand, got straight to work.
These fence panels are not light. And somehow, he managed to drag, lift, position, straighten, and secure nearly all of them on his own.
I helped where I could — mostly moving panels from one side of the lot to the other — but let’s be honest… this was Jason’s show.
And I still don’t know how he did it.
A solid cordless drill is honestly what made this possible — especially working solo. Something like this lightweight drill is perfect for projects like this.

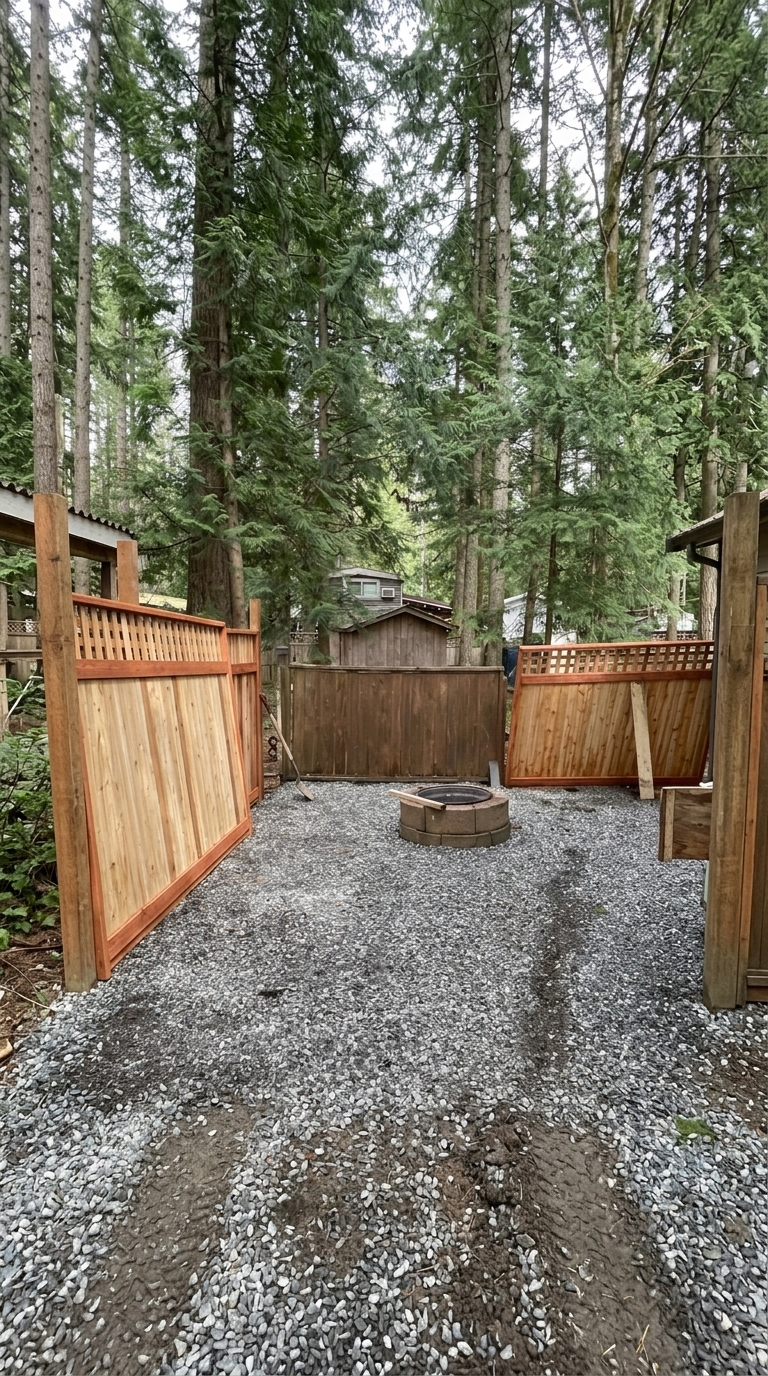
THE PROGRESS (80% DONE)
By the end of the day, we were sitting at about 80% complete — which honestly feels huge.
✔ Most panels installed
✔ Layout is finally defined
✔ The space already feels more intentional and private
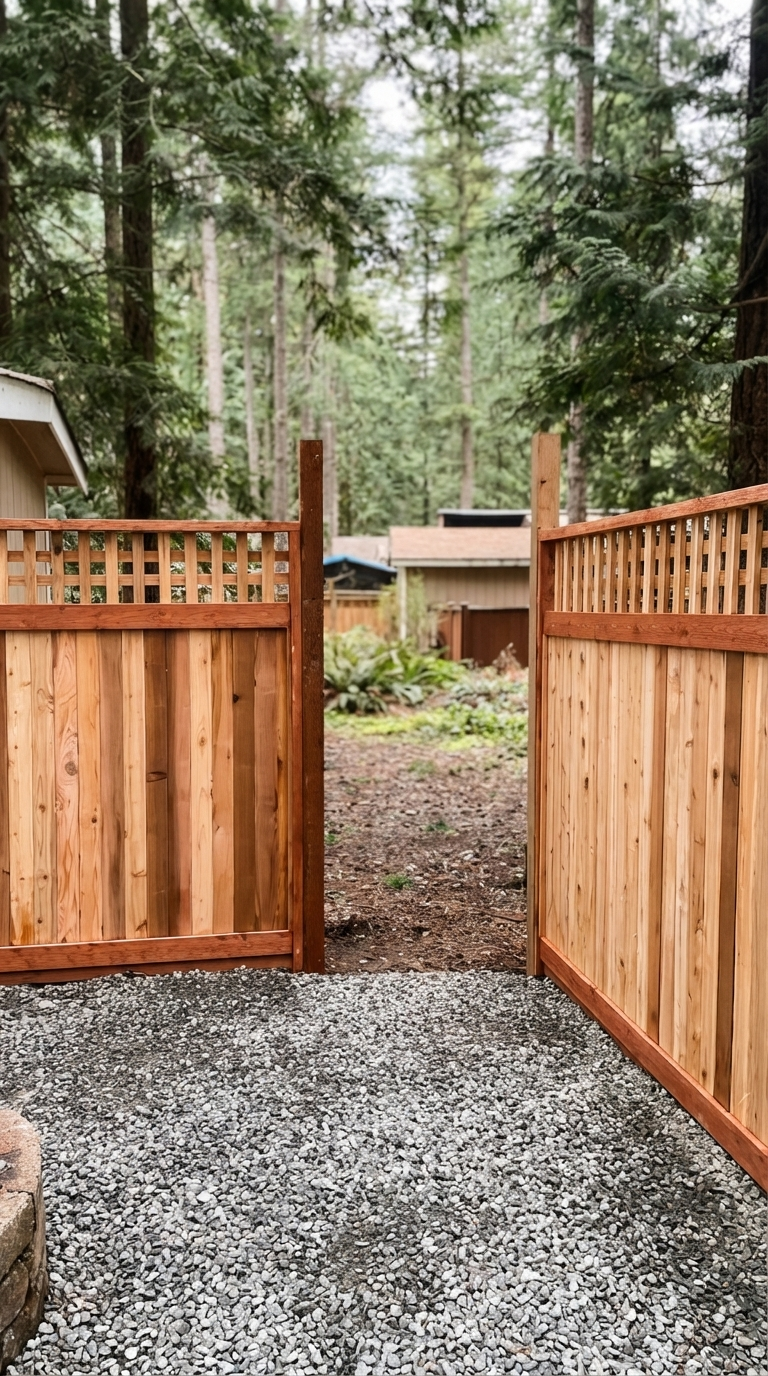
What’s left:
- A custom gate (this will be key to making it feel seamless)
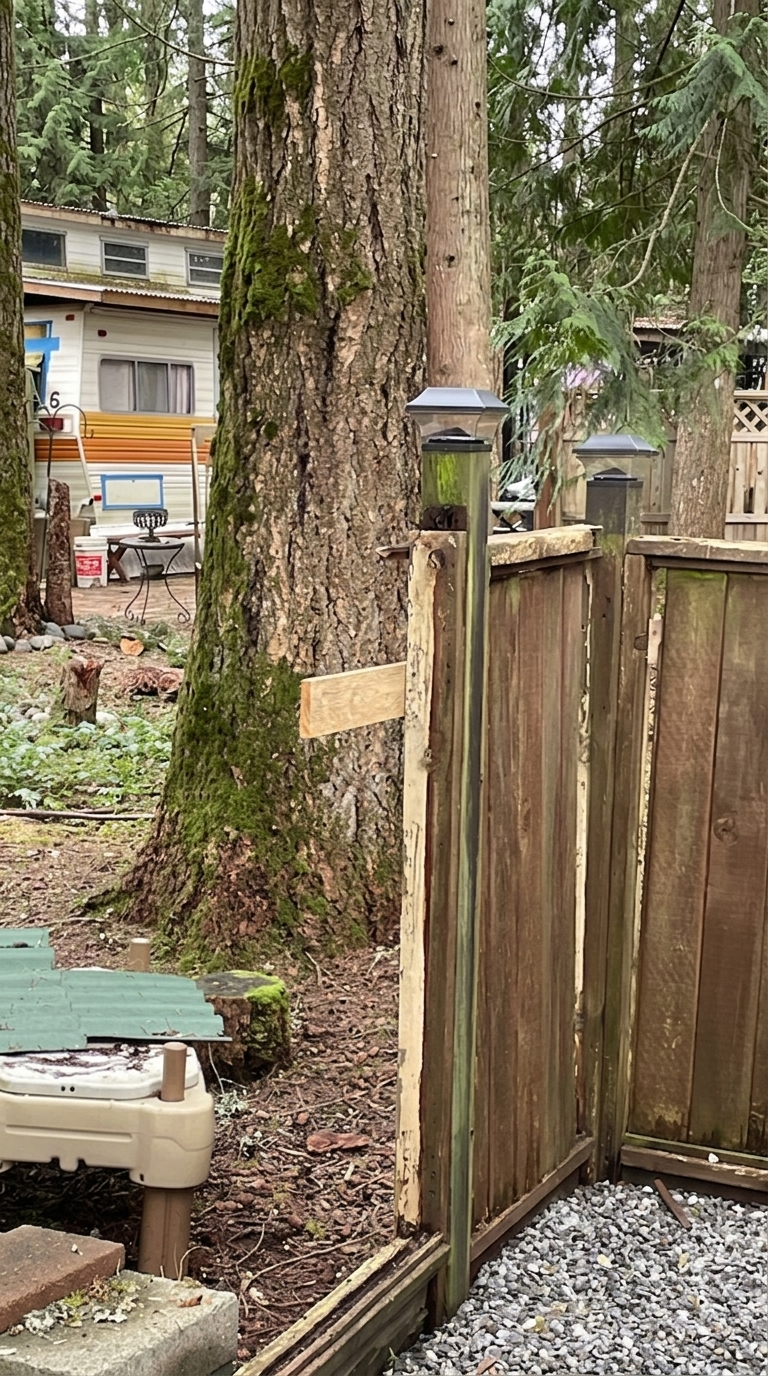
- About 3 panels on the right side — where our ahem “messy” neighbours are
Let’s just say… they’re going to notice the upgrade next time they show up.
This build is part of our ongoing tiny retreat transformation — after finishing the gravel base, the fence was the next step in defining the space.
👉 Grounding our ranch with gravel and spring plans
What We Learned From This Fence Build
Even though the project isn’t fully complete yet, there were a few things that stood out right away:
- Fence panels are heavier than you think
If you’re planning to do this solo… just know it’s possible — but not easy. - Layout matters more than speed
Taking the time to line everything up properly makes a huge difference in the final look. - You don’t need a huge crew
I still don’t know how Jason did it, but this proved that with the right tools and determination, you can get a lot done with very little help. - Progress changes motivation
Once a few panels were up, everything started to feel real — and that momentum helps push the project forward.
If you’re thinking about tackling a fence project like this, having the right tools makes all the difference — especially if you’re working with limited help like we were.
Fence Build: Tools & Supplies We Used (or Recommend)
If you’re planning a similar DIY fence project, these are the essentials that made the biggest difference:
| Item | Why It Matters |
|---|---|
| Exterior Wood Screws | Strong hold for panels (won’t loosen over time) |
| Cordless Drill | Absolute must for speed + ease |
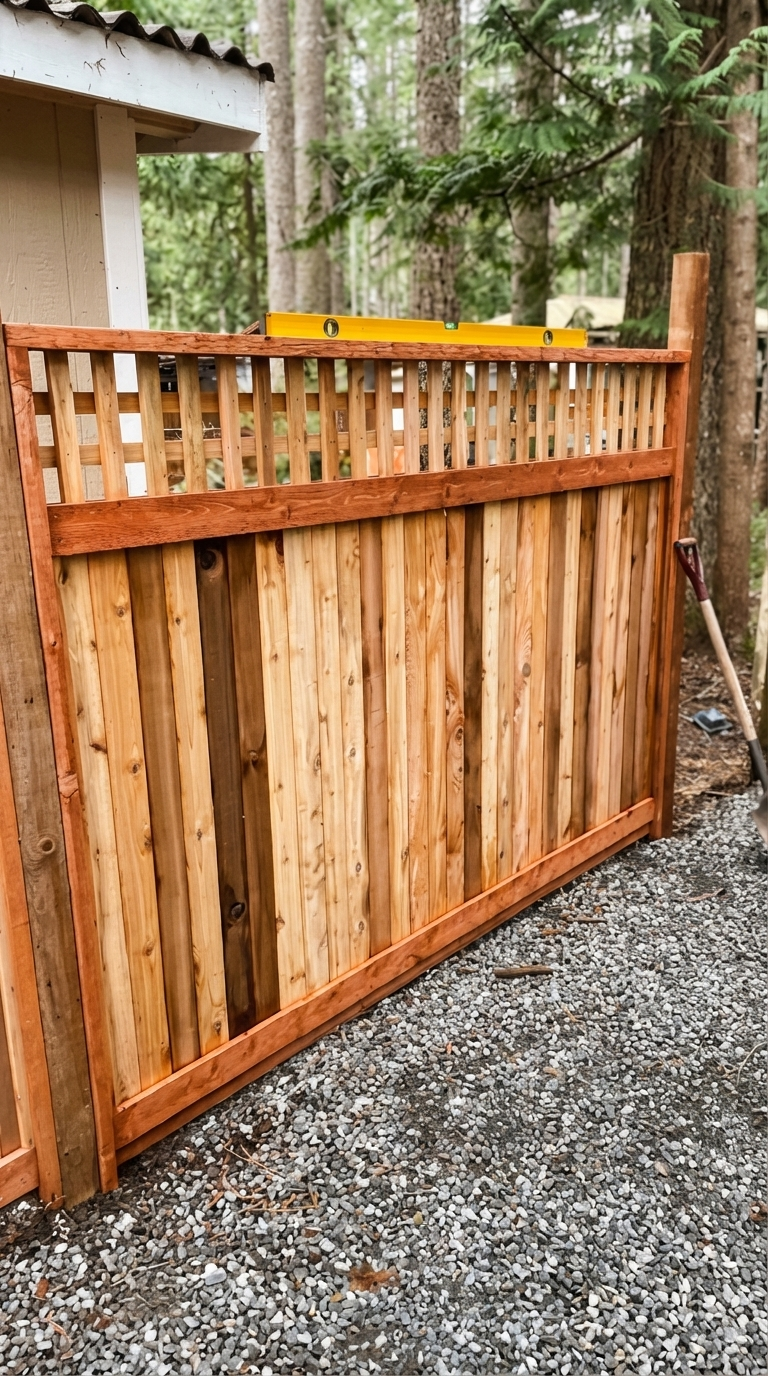
| Level Tool | Keeps panels straight (critical for clean look) |
| Work Gloves | These panels are heavy — trust me |
| Measuring Tape | Helps keep spacing consistent |
| Exterior Paint (for later) | Ties the whole space together |
| Paint Brushes + Rollers | For smooth, even coverage |
| Outdoor String Lights | Adds instant warmth + ambiance |
| Large Neutral Planters | Softens the space and adds texture |
These are simple, practical items — nothing overly complicated — but they make the entire process faster, easier, and a lot less frustrating.
WHY THIS FENCE CHANGES EVERYTHING
This isn’t just a fence.
It’s the moment the space started to feel like a real retreat.
Before, everything felt a little open, unfinished, and undefined. Now?
It’s structured. Clean. Elevated.
And most importantly — it finally feels like ours.
You might also love:
- Tiny Retreat Fence Plans & Landscaping Ideas
- 10 Simple Patio Ideas to Make Your Outdoor Space Feel Like a Resort
- Coastal Neutral Decor Ideas That Make Any Room Feel Like a Vacation
DIY ranch fence project progress with modern rustic wood panels on a small rural property
Before vs After: The Difference Is Huge
Before the fence, the space felt:
- open in a not-so-good way
- unfinished
- a little chaotic
Now?
It already feels:
- more private
- more structured
- more intentional
Even at 80% complete, it’s one of the biggest transformations we’ve made so far.
WHAT’S NEXT
Now that the fence is (almost) done, everything else starts to come together.
Here’s what’s next:
1. Paint the Covered Patio
This is going to be a big transformation moment.
We’re thinking black to tie in:
- the fence
- the structure
- and future lighting
We’re planning to use a durable exterior paint in a deeper tone to tie everything together. Something like this outdoor paint option works really well for wood surfaces and holds up over time.
2. Tie Everything Together
We’re leaning into that neutral desert / Arizona-inspired look:
- gravel + pavers (soft grey tones)
- cedar wood accents
- black structure details
- cream textiles (pillows, cushions, planters)
3. Shed Roof Update
Small change — big visual impact.
4. DIY Projects + Pressure Washing
The unglamorous step that makes everything else look better.
5. Lighting (My Favourite Part)
This is where it goes from “nice” to magazine-worthy cozy.
Think:
- soft string lights
- warm glow accents
- layered lighting for evenings
Lighting is where everything shifts from “nice” to cozy. I’ve been looking at these warm outdoor string lights to create that soft evening glow.
Thinking About Building a Fence Like This?
If you’re considering a DIY fence project for your backyard or rural property, this is absolutely doable — even on a budget.
A few things to keep in mind:
- Pre-made panels save a ton of time
- You don’t need fancy tools
- Neutral, simple designs always look more high-end
- You can build in phases (like we did)
This kind of project is one of the fastest ways to create a backyard transformation that actually feels finished.
Shop My Outdoor Favorites
If you’re working on your own outdoor space right now, I’ve been saving all the best neutral, modern, ranch-inspired finds in one place — from lighting to planters to patio upgrades.
👉 You can browse everything here:
[Simple Patio & Tiny Retreat Finds]
It’s a mix of what we’re using, what I’m planning to use next, and pieces that help pull everything together without overcomplicating the space.
DIY ranch fence project progress with modern rustic wood panels on a small rural property
TIMELINE (RELATABLE + REAL)
We’ll be back up over Easter weekend, but with Jason curling, we likely won’t get much done.
Realistically:
👉 The following weekend = fence completion day
And honestly… the timing couldn’t be better.
The weather should be warm enough to start painting — which means everything will start coming together fast.
FINAL THOUGHTS
This project wasn’t perfect.
It wasn’t easy.
And it definitely didn’t go according to plan.
I was sick, the timing wasn’t ideal, and somehow Jason still managed to pull off what felt impossible.
But here we are — 80% done — and the difference is already huge.
It finally feels like something is coming together out here.
And those are always the projects that end up being the most worth it.
I’ll be sharing the final reveal (and the gate!) very soon.
Shop This Outdoor Look
If you love this clean, neutral ranch style, these are the pieces that help pull it all together:
- Outdoor string lights
- Neutral planters
- Black exterior paint
- Gravel + paver styling
- Simple patio furniture
👉 Browse everything here:
[Small Pation & Tiny Retreat Finds]
Follow the Tiny Retreat Transformation
If you’re following along with this project, here’s how the space has come together so far:
- Gravel Base & Layout
- Fence Plans & Landscaping Ideas
- Fence Build Progress (this post)
- Coming Next: Patio Paint + Lighting + Final Details
You might also love:
Leave a Reply